Thursday, October 31, 2013

Waiting for Plastic

Waiting for Plastic

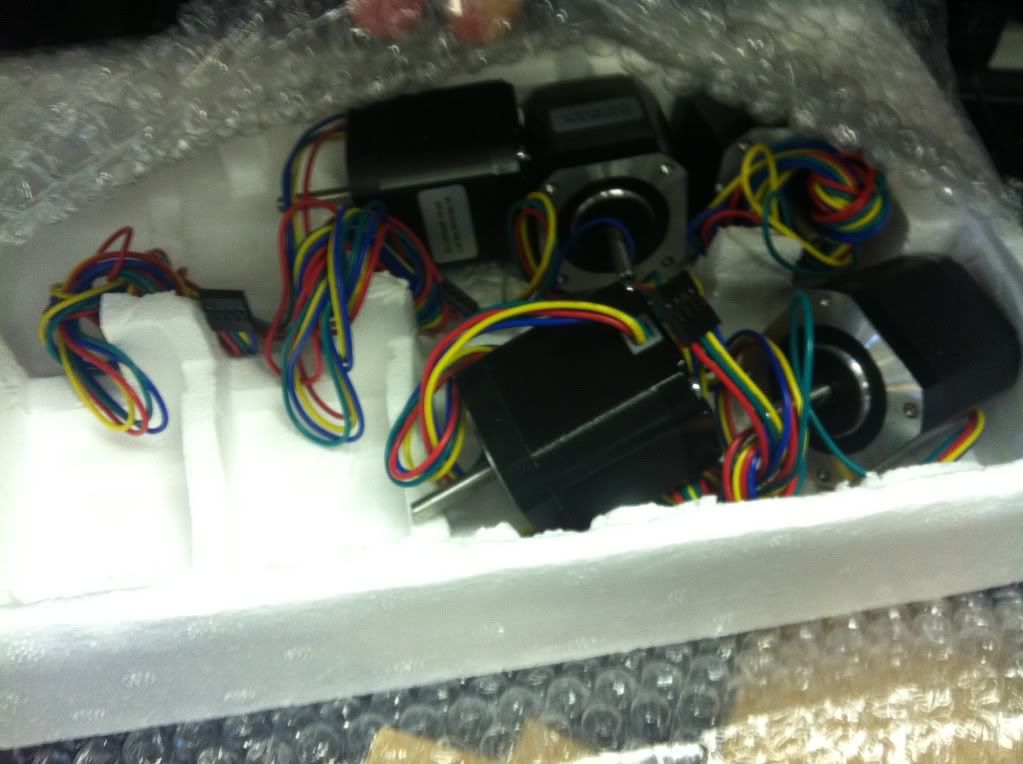
So the last update covered getting all the mechanical pieces assembled including the stepper motors, belts, pulleys, etc required to move the three different axis in order to create a 3d object. The next logical step is installing the control system that takes the control codes and drives the printer.

Ramps, Marlin, Slic3r, and Pronterface

Sure, veteran 3d printer builders know immediately what those are and likely how to use them. Me, not so much. What is a Ramps v1.4? Marlin sounds like a fish, Slic3r lethal and Pronterface like a personal problem. One thing I DID know was that somewhere in all that an Arduino micro-controller was going to be involved and I have learned a lot about them over the past year or so. I had already done some research and asked many questions at LetsMakeRobots.com (Never really thought of a 3D Printer as a "robot" but it IS physical computing as it was point out!) and was guided to use Ramps for the stepper, hot end, etc controller board (this mounts on top of the Arduino Mega that is used at the micro-controller), Marlin for the firmware that runs on the Arduino to do the actual work of controlling things, Pronterface for the printer interface, and Slic3r for the "slicing" part.

That's pretty much the overview of how it all works. You download the firmware or your choice, review and and tweak a few settings to match your particular type of controller and printer, install that on the Arduino Mega. Then you can use Pronterface to control the printer. Pronterface lets you control the printer but also pushes the "G-Code" to the Mega to process for the print job. But before you that, you have to use something to take your 3D model, most of which are in a .STL file format, to "slice" out each layer you are going to print. Once sliced up, the G-Code file is created that the firmware reads and then controls the printer. G-Code is a common 3D system code set used in CNC equipment, etc. Something else learned along the way. You can learn more about G-Code here: http://reprap.org/wiki/G-code

Really the best online source I found for a Prusa I2 build is here: http://www.nextdayreprap.co.uk/prusa-mendel-build-manual/. This will NOT be exactly like your printer or build but should be very close for an I2 setup. The software area will need to be adjusted for your selection / use as well. Software wise there are some prerequisites such as Python, Py-Serial, PYreadline, etc that may or may not be required. I just followed the directions and links from the site and it worked out. I did install Skeinforge along the way as in the instructions but have used Slic3r as it seems easier to use to me. No need to repeat all that here as the link is quite good.

Read the Details

One mistake I made, and one of the reasons I am "Waiting for Plastic" is that I ordered my JHead thinking it was a 3mm OR 1.75mm by removing the inner liner for 3mm. Everyone said 3mm would be easiest to start with and is more common so I thought fine, I'll just start with 3mm and ordered some black PLA to be ready. JHead arrived, I reviewed how to remove the liner and realized that wasn't the case. I then looked back at my purchase and the site clearly says "if you want 3mm tell them and they will drill it out for you", or you can drill it out yourself. Well knowing my drilling skills I was NOT going to try to drill a hole through the liner and cap so after more input from the LMR experts I decided to just go with 1.75mm. It's supposed to be better in the long run anyhow. No problem, 1.75mm ordered, went ahead and picked a couple different colors so should be here by print ready time. Well that's part of the story.

It's Alive!

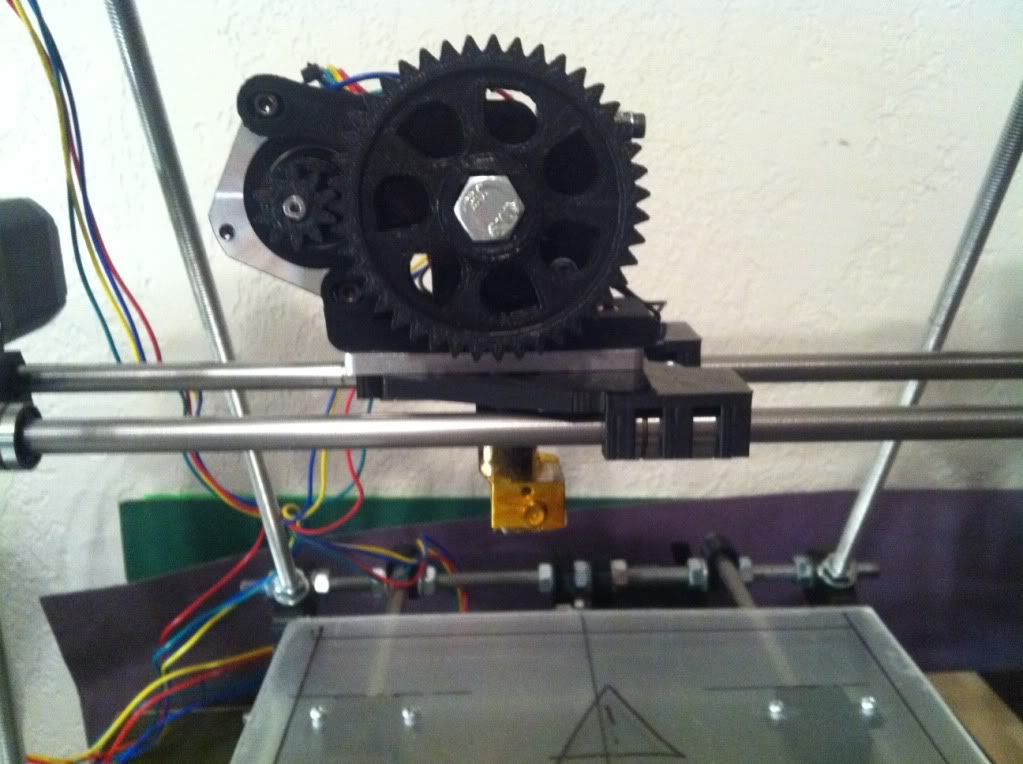
Commissioning is always that weird exciting, scary, anxious, ready to make it happen experience. Similar to the first firing up of that hot rod engine you just spent a few grand putting together and hoping it doesn't all blow up, or in this case turn to blue smoke. Mine went really unceremoniously as the Mega took the first load of the Marlin firmware without issues. I did follow the Commissioning steps for the most part on the site above and only had to tweak a few configuration variables. Thanks for jinx, hoff, ossipee, birdmun and others online they cleared the path to understanding what I was actually doing. Without the Hot End hooked up I could get all the motors to move except the extruder which will not be allowed to work unless to hot end is up to temp. Since I do have GT2 belts and pulleys the default settings work but I did have to change the z axis from the Marlin defaults to get properly  Z height values.

Buzzy Steppers - No Move

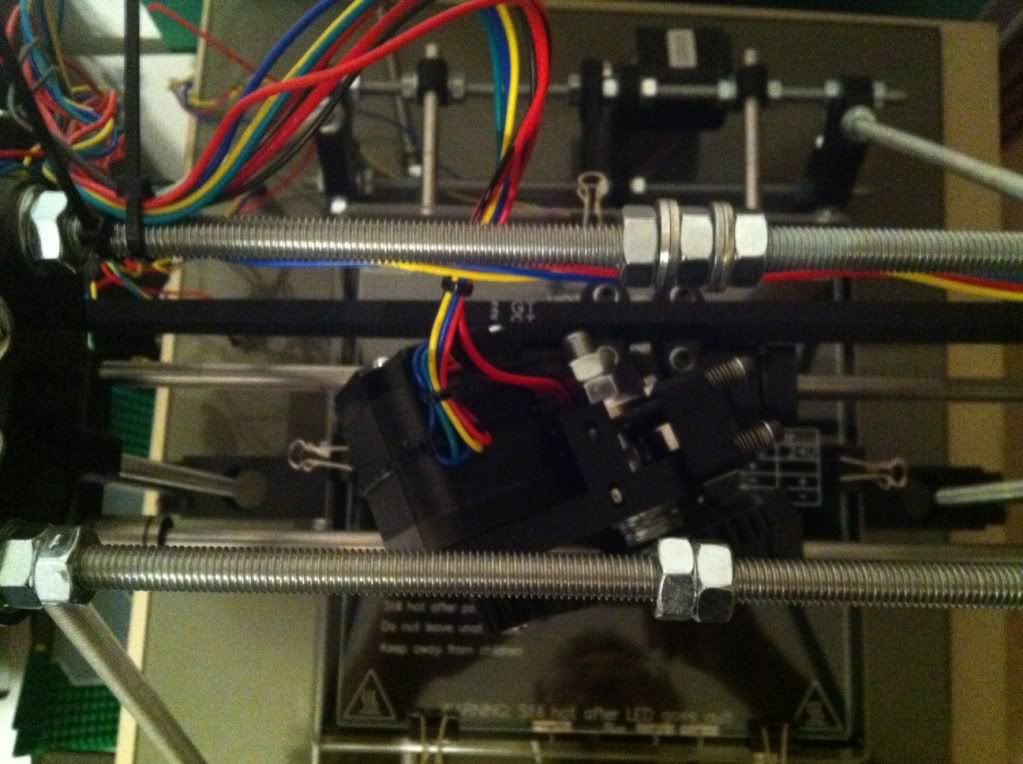
The biggest issue was initially the steppers could step if I used the .1 or 1mm movements but at 10 or 100 they just sat there and buzzed. Troubled by the fact I didn't really find anything online that suggested any solution besides adjusting the current settings on the stepper controller boards which did not help I was stumped a bit. I finally found a bit of info online that was also suggested by jinx in regard to the jumpers UNDER the stepper boards. Unless the jumpers are all on, the board is not setup to microstep, a requirement for printing properly. I can't quite understand why the Sainsmart electronics kit I bought for a printer did not have any jumpers with it but I savaged enough  from some cheap PIR sensors I have to install them for the main steppers and viola it worked. Thanks to jinx for saving me on that one.

Continued Commission

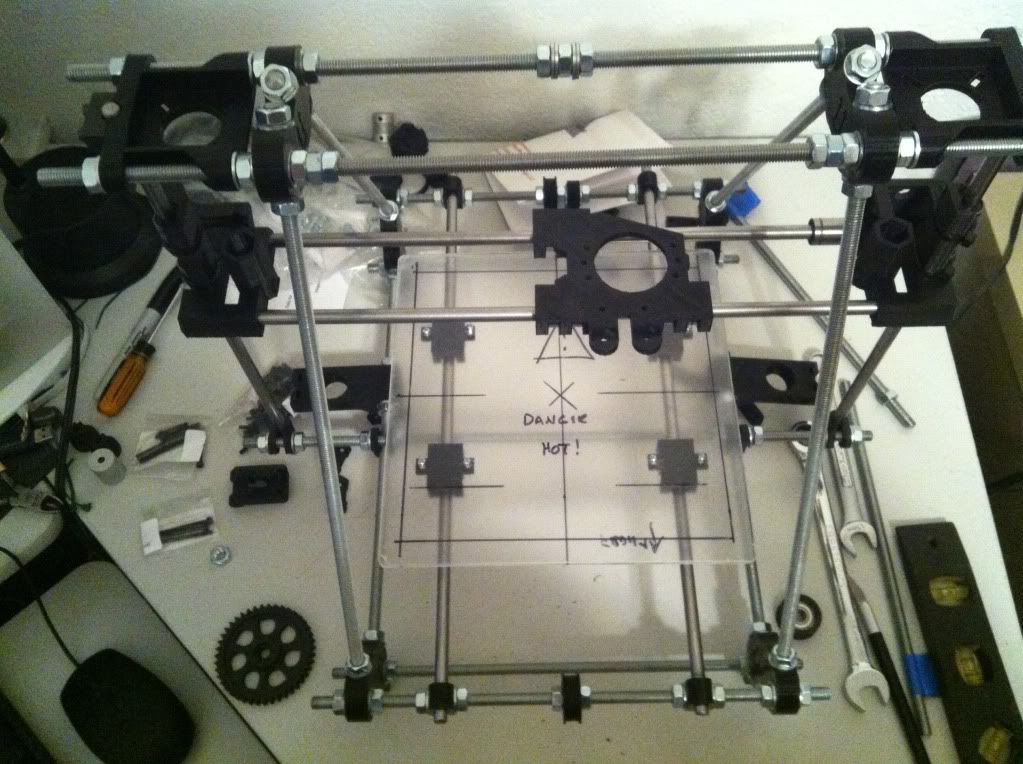
Once I could see I could move the motors I moved on to getting all the end stops installed and working. My electronics kit included some fancy endstop switch boards. To me these ended up being a waste as they are quite limited on how you can mount them making it a little difficult to find the best mounting locations. I could not scrounge up enough normal micro switches or I would have just replaced them. Once installed jinx helped me with the M119 command to check if they are on/off, I immediately found I had wired them up backwards (although I wired them as noted on the Sainsmart website) as normally closed when they should be normally open. Since they were enabled it wouldn't let me move any motors. At least I knew they could work. A quick swap out of the connections yielded the correct status.

Bed Leveling

An important process for the whole thing is getting your bed level, especially as compared to the print head axis. By now I felt pretty confident that the printer was square and everything was as level as I could get it. So now I needed to mount the heated bed (heat not wired yet, just printing PLA for a while so no heat needed) and glass and get it leveled out more precisely. Originally I was going to get some springs for the bed from the hardware store but rummaging around in my Dads old parts bins that I've had forever turned up some pretty usable springs. They are bee-hive type springs and were the perfect height for the screws I had for the bed mount. Also with the smaller top area the screw fits in perfectly keeping it centered. At first I had tried to run the screws from the bottom up so I could adjust the nuts on the top of the bed. Mistake! For one I didn't drill the holes close enough for it to work if I locked the screws in the bottom plate. I should have done like hoff says and used the bed as the template, drill one, screw it together and drill the rest. The other reason having the screws coming up from the bottom is it's just messy. Must easier to simply press down on the bed/spring a bit and move the nut. And yet another reason is you have longer screws poking up around that sub millimeter sized hot end outlet. No need to risk damage more. Once the printer is working I will likely print some of these or similar to make using the nuts even easier: http://www.thingiverse.com/thing:152043


Printing Air

So with the endstops setup, basic bed leveling done, and the software figured out I thought I could do a test print but without plastic. Here you'll see no extruder activity since the hot end is not fired up but it really seems to be moving ok and rough measurements show it's not completely off base. I also ran some test with the hot end fired up and the extruder moves the right directions as needed.

Now if I just had some filament.

Waiting for Plastic

So I'm still waiting for plastic. Wait, I said I already ordered some right? Yes I did, but one week later I checked the vendor website for status and the order still says "Pending"... Nooooo! I did send a contact email asking what was up but no answer a day later so I jumped back online, found a vendor close to home again and bought another color. In this case within a couple hours the vendor sent a shipped status and a couple hours later the tracking said it was already processed and sorted at the sending PO.

So hopefully waiting for plastic will not be a long term status.


Wednesday, October 23, 2013

3D Printer - Progress

Assembly Continues

My hardware kit was supposed to have the needed metric cap screws, washers, nuts, etc for a Prusa I2 build but since there are many different iterations of the I2 it really wasn't complete. I found a couple additional kits of 25 pieces of M3 screws and picked up some different 10mm, 15mm, and 25mm lengths to have during the process. With the needed screws on hand I could try to move froward with more assemble.

JerZ to the Rescue

Although my parts kit came with some lower Z stabilizers, it did NOT come with the plastic caps required to use them. The kit had two caps that are used on the top of the Z smooth rod but nothing for the bottom. After discussion in the LMR forum, it was advised to NOT use the stabilizer bearings and instead let the threaded Z rods dangle in the air allow some end movement. The point is that if you lock the ends down and the threaded rod isn't perfect, you will get X Axis movement that will create print errors.

For me, I really liked the method that the Z smooth rod end mounted down low making it much more likely to keep the rods parallel so JerZ offered to print up a couple end caps that were missing and mailed them to me. The worked great and it was much appreciated! This removed the extra wide lower center threaded rod and cross bar clamps and the need to make a lot of adjustments to keep the Z rods parallel. That's what I think anyhow.

Step Step Step - Steppers

The stepper motors move the print bed forward and backwards, the head carriage left and right and the whole head assemble up and down. X/Y/Z - three planes and you have 3D. The recommended steppers for many printers are "NEMA17" units but of course I found out quickly there are many variations of them online. Different voltages, holding torque, some with D-shafts, others without, and on and on. Once again to keep it simple I searched specifically for 3D printer ads to try to at least narrow the choices down some. I also have some good input from birdmun in regard to selecting steppers with connectors at the motor.. which you can see in the pics I did NOT follow and may ultimately wish I had. His point is if you have socketed steppers you can more easily swap one out if you have an issue or dead motor. Very true, guess I'll be cutting/splicing wires if something happens.

After looking/poking/questioning around I locked down on a set found on ebay that are NEMA17, 76 oz-in holding torque, 4.2v, have the D Shaft, and are 1.8 degrees per step which I believe is the correct specs for what I'm doing. The actual part number is KL17H248-15-4A. They do NOT have sockets at the motor but they do have nice 750mm leads on them making it much easier to route the wiring back to the electronics.

"Some Clearancing May Be Required"

You see this with most printed printer parts you find online. Basically it's saying "Hey, these are printed parts, they are pretty dang close but you have to cut on them some to make them work". And cut on them I did have to. The worse areas were the 3mm nut capture areas that the nuts just would not fit into. Exacto knife skills saved the day but be warned, it's still easy to split parts due to the layered method of printing. I also just smoother some of the edges up, cleaned up stray strings, etc to try and make it all work and look a little better.

This was especially true on the extruder build and I did split out a couple parts slightly. I used some superglue to fill in the split and hope that will resolve any long term issues.
Another issue was getting the extruder Hobbed Bolt, the bolt that has a grove in it and ribbing to grab the plastic filament and push it through the extruder. The area where the head is supposed to fit into was pretty nasty in the print so I had to clean it up and try to make things fit. After that I still couldn't get it to fit at a perfect 90 degrees to the gear so I had gear wobble. It meshed ok, but I didn't like the wobble so the suggestion was to heat up the head enough to kind of melt it into place and 90 degrees position. Used a butane lighter, a little heat and it seems to have works. You can see the head doesn't quite fit into the socket on the gear though here. It's solid but I think I'll drop a bit of super glue in to make sure. I bought two hobbed bolts to have a spare so even if I move to a herring bone gear set I have a bolt.

The hobbed bolt is another part that could have been built at home I guess. It's a basic 8mm bolt with a notch and ribbing done on it but for $12 I found two online with the nuts and washers and figured it would take me longer to try to do it myself than $12 worth of time.

Hot End
To melt the plastic and get it down to the sub millimeter stream needed to print something, you need a "hot end". After research, reason, and lots of input from LMRians I went with the tried and true J-Head design. Since I picked mine up on ebay it is likely some knockoff but should work. It has a 0.4mm output, was supposed to be able to use 3mm or 1.75mm filament and had the heater and thermistor already installed and setup. I also had to get a mounting plate to hold it in the carriage and extruder. Hot end in hand, moving on. I had already ordered some 3mm black filament so I decided to do whatever was needed to make the J-Head use that size filament as I could tell it was setup for 1.75mm when I got it. After pulling it apart and discussing with hoff70 it became apparent that the head was MADE for 1.75mm but COULD be drilled out for 3mm. Looking back I can see the ad for the unit said THEY will drill it out for 3mm if you want before shipping. So another minor setback, can't use the 3mm filament I have now but the recommendation was to go with the 1.75mm size. It is supposed to be better/cooler/tighter/etc anyhow. So I coughed up some more money and ordered some 1.75mm black and went ahead and ordered some red as well as I really didn't want to be stuck printing black for too long.

Getting There

With the extruder together and the recently purchased hot end in hand, I finished mounting the extruder to the carriage. Still no belt on it but wanted to make sure it all fits together, belt route clear, etc before doing that. One thing again about clearance work, be care and make sure the nuts fit in the captures. The but was a little tight on one side of the hot end mount and forcing it in created another small layer split.

With the extruder on the carriage I checked the movement back and forth and although tight I believe it is working as it should.

Mounting Steppers

Mounting the steppers is really pretty straight forward. I just needed to make sure I used the correct length cap screws that weren't too long but not too short either. Some clearance work on the mounting slots and they fit just fine. There is now a mass of wires going nowhere but I'm not routing anything until I have the electronics in hand and plan where to mount it all.

With the Z Axis motors in I hooked up the CNC aluminum couplers that connect to the Z threaded rods. These seem much better and isolating any threaded Z rod imperfections but with anything there are those who say don't use them as well. Some say they will sag/stretch over time affecting the Z axis. Maybe so but they seem to much better than a hard clamped mount that comes with the original parts kit. I think with some continuous tune ups and system checks any sagging can be adjusted out as needed.

The Print Bed

A very important piece that needs to be right is the print bed. Although many get great results from printing on anything, I figured I need to build what I want up front. With that in mind, I included a heated print bed in my kit so I could print ABS later on if desired, but also it seemed like the easiest way to mount a nice thin setup. For the base, I used some 1/4 acrylic that I picked up at the local hardware store. I noticed that many use it as their base as it's flat, easy to cut, and just looks nice. After I cut it out to the basic size, I did hear from some on LMR that you need to protect it from heat if you are mounting a heated bed as it can warp. Figures.

So with a nice piece of acrylic for the lower bed mount, I ended up covering it up with some classic Mr. Gasket exhaust gasket sheet that I plucked from my garage and my car hobbies. This stuff can handle hundreds of degrees so it should protect the acrylic  from the heat bed. I even mounted with the Mr. Gasket logo up top just for the heck of it.

I also picked up some small springs at the hardware store to use to mount the heat bed/glass on for adjust-ability as many have done. I could have used ball point pen springs but these are similar and should work fine.

Belted

Next up was to get the belts on for the X and Y axis. I mounted the Y axis bed belt first using the included belt clamps but also use the trick of using small zip ties to hold a loop at the end of each belt and then one to tighten those loops together so you can pull the belt tight with the zip tie before tightening down the clamps. Worked well for the bed and I had smooth motion to and fro.

The X carriage setup wasn't quite as easy as there is not enough room between the two clamps to do the zip tie method. For this I clamped down one belt end and then left some extra length on the other end allowing me to pull it tight and clamp it down. Carriage moves left and right fine without any issues!

Extruder Mount
Next was the final mount of for the extruder and hot end on the carriage. After putting the extruder in place and starting the screws another problem arose. With the longer, higher torque, stepper motors, the motor extends backward into the path of the belt creating interference. At first I wasn't sure what to do besides get a short stepper for the extruder but after pulling it back off I found the angled mount holes that allow mounting the extruder slightly sideways. Mounting it like that clears the belt in the back but it does make the motor hit the threaded rod on the left side before getting to the edge of the print bed. Oh well, will have to do and limit switches should keep any interference at bay.

Summary To Date

So at this point the chassis is built, lower print bed mounted, steppers mounted, extruder and hot end mounted, all axis are moving properly manually and I've started routing and organizing wires. I've also labeled all the steppers with my label machine. Electronics are here so last steps are finalize bed leveling setup with springs, wire up the heat bed eventually along with the thermistor for that. More to come!


Monday, September 30, 2013

3D Printing... Attempting...

So with so many LMR (http://www.LetsMakeRobots.com) enthusiasts building, buying, printing, or renting 3D printers I figured I’d jump on the bandwagon and go along for the ride. I can really see the joy in being able to just print cool things off ThingiVerse much less the thought of designing some little mount, feature, cover or whatever for a robot you may be building.


Fear Factor


Having watched those who have built printers in the public eye like Hoff70, DanM, (others?) and seeing the vast list of options, printers, versions of the same printer, options on top of options for existing printers, and all the other confusing stuff that swirls around the 3D print world, I was quite leery of getting my feet wet, much less diving in headfirst and risk breaking my neck… or pocket book.


However, after a while of reading, watching, and listening to all the builders like Jinx, TinHead, and others and reading through a couple build manuals online it seems to have slowly come together into something I can finally being to grasp. Sure, the basics are simple, print head (and/or bed) moves in X/Y/Z manner while print head drops a precise amount of melted plastic or other material into a particular shape. Easy enough.. but then you start hearing GCode, PronterFace, Ramps, Sanguinololu, Skeinforge, PrintRun, send.py, and a million other speciality pieces of the process that at least I had no clue what they were or what they were used for.


Fortunately the LMR shoutbox is quite often full of 3D friendly people and just watching the conversations there, AND using the Internet for everything they said I didn’t understand I started to see that I could eventually make some sense of it all. At least enough to put something together and get started.


But Which One?


Of course, when you start looking you’ll find there are LOADS of different printers, versions, and obviously price ranges. For my first build I really wanted to get something large enough I’d be happy with but Uncomplicated enough that I could (hopefully) get it working and tuned well enough for quality prints. I looked a few options from the EventorBot, that looks nice and simple but apparently it’s kickstarter founder is no longer answering questions at this time, a Prusa Mendal Max that looks nice and sturdy but requires more specialized metal parts, a Rostock with it’s cool movements but circular print area, and a few others.


After asking around in the LMR shoutbox again most were saying for simplicity sake and easy tuning go with a Prusa model so I narrowed down on the RepRap site for options. After checking out the options there the Prusa Mendel I2 seemed to be the most popular and still should provide a good platform. It was actually kind of difficult making the final decision on which direction to go, I guess due to the time and money that will be invested, but likely just my uncertainty of what it’s all about.


The Plan


Having made the decision to go with the Prusa Mendel i2 I dug head long into what options there were. Buy a kit of all the parts? Buy a pre-assembled one?  Source out the parts separately? Or what the heck else. Although very likely buying a pre-assembled one or even a full kit may be the best bang for your buck, I decided to piece my own together from various sources and see if I can save any money and still make it work. Plus the treasure hunt for parts seemed to appeal to me anyhow forcing me to learn more about what are the best pieces to use or at least the most popular. It also lets me break the whole thing down in phases allowing it to smoothly fit into my budget.


After reading through more assembly manuals I found online I finally got a basic parts group figured out and dropped it all in a spreadsheet to review options, prices, etc. I really ended up just breaking it up into Rods, bearings, metric hardware, printed parts, extruder, hot end, electronics, power supply, steppers and pretty much “other” with estimated prices on them all.


I also had some enlightening discussions with other printer owners about going 8mm metric or keeping it easier to get parts by using 5/16 SAE rods. Although I could save a few bucks on the 5/16 stock, I decided for a first timer I better stay the course and stick with a known so I’m going with the metric setup.


Off We Go


So armed with a list and estimated prices I headed online to eBay, MakerFarm, SainSmart and others planning out my purchase route. The first steps are getting the basic frame built so I looked through options for rods, metric hardware, printed parts, and linear bearings. I also ran across some 5mm x 8mm couplers that looked like a better option that printed and picked them up as well as some metal stepper gears and GT2 belts. The rods, printed parts, and hardware arrived I spent an afternoon assembling it all. I chose an un-cut rod kit so quite a bit of time was measuring and cutting threaded and smooth rods to the right lengths. I also polished the smooth rods with some 1000 grit wet sand paper hoping to get things as smooth as possible. Note in the pic above the carriage is on backwards - fixed it right after that pic.


So What’s Next


As noted I broke the project down into three phases of which the first has been spent. The next phase will be for Steppers, Hot end and mount, skate bearings, Hobbed bolt, bed plates, etc and other misc items. After that will be the final electronics which I believe I am going with a SainSmart kit to keep it all together using Ramps 1.4, A4988 driver, Mega2560, end stop switches, heated bed, cooling fan, and a nice large LCD / Controller setup. The LCD/Controller should have an SD card as well for future computerless prints.


Software

As noted before, there are many different hardware configurations but the most confusing part for me was the software options out there. Everything from what CAD app to use to create or view parts to the controller versions and PC interfaces are all foreign languages at this time. I ended up finding this site to guide me through it all for the first try. http://www.nextdayreprap.co.uk/reprap-downloads/ I liked their walk through from the very basics of downloads through install and testing. I know there are some newer versions of the pieces out there but for now I plan on getting it working using their guidelines and then worry about possible version upgrades if warranted.


I’ve already worked through the download and installation process they have listed and have PronterFace running on the laptop I plan on dedicating to the printer interface. It doesn’t have anything to talk to so it may not be a good install but it looks cool on the screen. :-)


Upgrades


Of course browsing around ThingiVerse is not necessarily a good thing to do, even when you do NOT have a printer yet. I’ve already found several “upgrade” pieces I’d like to print for the printer itself once I get it working and tuned up. Things like a simple spool holder, filament guide, filament dust filter, bracing, fan holders, integrated Z motor mounts, etc. along with many cool robot pieces like Basile’s cool wheels, pan/tilt parts, and of course the BoB robot. Print, print, print! Of course I’ll have to print a few hundred small cubes along the way to get things working right.


The Future

It may take me a few months to get it hacked altogether and moving around but I’ll keep plugging along and posting updates as the project moves forward, or backwards.

Thursday, July 12, 2012

Proximity Sensing Using Latitude and VBScript

Are You Home Yet?
The System Knows...
NOTICE: With the killing of Latitude by Google in 2013, this approach no longer works. Just be advised - too bad, it was a handy solution IMHO. - Stephen

I have played with how to tell my Home Automation system if I was home or away for quite some time. Sure I can press a "home" button and an "away" button but what fun is that for a "Smart" home? I wanted the ability for the system to "know" if I'm home or not "automagically" without my sometimes forgetful intervention.

Back before moving to an iPhone I had a bluetooth solution "semi-working". The phone was paired with a bluetooth adapter on the server and some software was running that could tell if the phone was in range or not. A script would then spin through the status file, a simple flat text file, and see if my phone was local and adjust the status in my system. Kludgy but usually worked.

When I moved to an iPhone I was UNhappy to find out that the same bluetooth option would not work so I was back to figuring out a new solution. This time I wrote a script that "pinged" the IP my phone had picked up on the WiFi and if it was there then I was home, if not, away. That worked but I had to make sure I always had WiFi enabled on the phone and the script simply fired off a command ping which was very slow. Also sometimes the ping would time out anyhow if my phone was not active so I would suddenly be "away" when I was really home.

Google Latitude Tracking

The more recent solution is a combination of using Google Latitude (http://www.google.com/latitude), which I was already experimenting with, and a local VBScript that provides the linkage between Latitude data and my HA system. Latitude is available for various mobile phones and although obviously very "Big Brotherish" it provides a nice framework to handle the GPS tracking piece of a proximity system. It also provides all kinds of mobility analytics such as how many miles you've traveled, how much time you spend "at work" and "at home" and other rather interesting pieces of information.

To be sure, Latitude is not perfect. It usually has my GPS location pretty well tied down but you will always see occasional "way out there" points when it defaults to the closest cell tower instead of a tight GPS point. But overall it's pretty good at keeping up with where you're at. Personally I haven't see any major battery drainage issues either but I am unrelenting on charging my devices every night no matter how they were used that day.

Of course the first thing you have to do is download the Latitude app for your particular mobile device. Visit the Latitude page and/or your app store and get it working on your device first. There are apps for many of the devices out there so check out the page / links. Make sure the Detect Your Location and Background Updating are turned on in the Settings area so the app is constantly updating location data.

To make Latitude your friend for getting data out, takes a special configuration that isn't overly obvious. You have to expose the data using the "Google Public Location Badge" feature. Sounds like you're giving away the farm but this is just an option if you WANT to publish everywhere you go all the time. The key is, this lets you build the data link but you DON'T HAVE TO share the link. The public location badge allows you to publish either a road map (KML), JSON or ATOM feeds of your location data but we are just going to use the data for our own purposes and not publish to the world.

To get your data link, log into Latitude on the web, click on the gear icon in the upper right, and go to Application Settings. At the very bottom of the screen is a "Developer Information" link. Click on that and you will see the linkage information and your own special username code in the various formats. We are using the JSON format here so the URL looks like this:

https://www.google.com/latitude/apps/badge/api?user={Your Code}&type=json

Once you have this link you can leave the rest of the page alone and move on. Just make sure the Enable and Show Best Location radio button is check in the configuration and click Save. That's after you've checked out all the other tidbits of data you'll have available about your movements of course.

Mobile Status Screen for
My Home Automation System

Getting the Data

Now we need to get the data feed and do some location checking. This is where the VBScript comes into play. You can do this in any other scripting or other language if you want, this is just the easiest to write and understand for me. This script is then scheduled on my HA server to run every five (5) minutes to see where I'm at. I actually have it log my Lat/Lon into my own local database and then check for within a certain range of my home address.

VBScript Sample

The key features of the sample script are the GetLatitude and the GetDistance functions. GetLatitude uses your provided Google Latitude user code and pulls the current lat/lon data out of your feed. The GetDistance function takes two lat/lon pairs and returns the distance, in miles, between them. I am using a free online web API to do the distance comparison here but you could spin your own code if you wanted to. GeoCoder.us is free for the low level personal use I am dealing with here. With those two functions you can have your script do whatever you want with the results. The sample script below uses a CheckDistance variable to compare against the results and take action.

You'll have to clean up some of the &Amp code issues if you copy/paste the script but the overall process is very simple. Also if you are behind a corporate proxy, the URL gets may or may not work. I've run an enhanced version of this script that links to my Home Automation system and toggles my status for months now and it's been quite stable. The code could obviously use some error handling or at least what to do if we get 0,0 back as location or odd distances but that's up to you creative people out there.

'** GetLatitude.vbsGet Google Latitude Lat/Lon for the user and log to the Log database
'v1.00 - SWN - 10/29/2011

'** Debugging flag - True to see messages
MyDebug = TRUE

'** Your information and location to test against
'** Google Latitude User ID
UserID  = "{Your Latitude Code Here}"

'** Location Latitude to test against
LocLat  = 35.32

'** Location Longitude to test against
LocLon  = -96.92

'** If you are within 1/2 Mile of LocLat/LocLon then If triggers
CheckDistance = .5

'** First get the user (YOU) current location from the Latitude JSON feed
MyLonLat = GetLatitude(UserID)

'** Debug stuff - show it if debugging
If MyDebug then MsgBox "Raw Coords: " & MyLonLat

'** Split out the Lat/Lon from the results
MyCoordsA = SPLIT(MyLonLat)
MyLon = MyCoordsA(0)
MyLat = MyCoordsA(1)

'** Now do a distance check between the points
'** Note this uses another free web API, GeoCoder.us to calc this for us
'** You could build your own dist compare if you wanted... but why if this is there?
'** Distance returned is in Miles so you can convert as desired from there
MyDistance = GetDistance(MyLat, MyLon, LocLat, LocLon)

'** Show distance if debugging
If MyDebug then MsgBox "Distance: " & MyDistance

'** Now take action on the distance check results
'** Obviously you will have to have some session state here so this doesn't fire on every check
'** In my HA system, it sets a Home flag so my code checks if the should be changed and takes action if needed
If MyDistance < CheckDistance then
 '** Do something cool because you're close
 MsgBox "You are within " & MyDistance & " of your target location."
Else
 '** Do something else because you're not
 MsgBox "You are OUTSIDE of your target location by " & MyDistance - CheckDistance & " miles."
End If

'** get the Lat/Lon data from your Google Latitude Feed
Function GetLatitude(strUserID)
    
 Set objHttp = CreateObject("Msxml2.ServerXMLHTTP")
 objHttp.Open "GET", "http://www.google.com/latitude/apps/badge/api?user=" & strUSERID & "&type=json&callback=parse", False
 objHttp.Send
 html = objHttp.ResponseText
 Lines = Split(html, "[", -1, 1)
 Count=UBound(Lines)
 MyCoords = lines(2)
 MyCoords = LEFT(MyCoords,INSTR(MyCoords,"]") - 1) 
 GetLatitude = MyCoords
 
 Set objHTTP = nothing 'Release the object 
End Function

'** Calc the distance between two lat/lon points and return as MILES
Function GetDistance(Lat1, Lon1, Lat2, Lon2)
 Set objHttp = CreateObject("Msxml2.ServerXMLHTTP")
 GetLink = "http://geocoder.us/service/distance?lat1=" & Lat1 & "&lat2=" & Lat2 & "&lng1=" & Lon1 & "&lng2=" & Lon2
 objHttp.Open "GET", GetLink, False
 objHttp.Send
 html = objHttp.ResponseText
 
 '** Parse out the information here
 StartPos  = Instr(html,"=")
 EndPos   = Instr(html,"mile")
 GetDistance = Ltrim(Rtrim(Mid(html,StartPos + 1, EndPos-StartPos-1)))
 GetDistance = GetDistance * 1
 Set objHttp = Nothing

End Function


Tuesday, May 8, 2012

Mentors of Life

I met a man that I hadn't see for a long time the other day. He was a huge influence for me years ago and I had a chance to catch up on life with him. Thirty plus years ago he gave me opportunities as a "twenty-something" that I would be hard pressed to duplicate today for the younger people I know. I can't imagine handing similar projects over to someone that young that we're so important to a company.

Thirty some years ago, M J Madden [M.J. remembers Pearl Harbor as a child news article]  had a fledgling company called Tel-Elec Consulting Engineers that provided consulting engineering work to then giant Telcos Southwestern Bell and General Telephone. I hired on as a green draftsman just out of high school and trying to go to college. The Engineers would take field notes of where to place cables and a couple of us would take the notes and draw them up to look pretty. That was about it, just drawing up what was already designed, adding title blocks, and nice consistent text by hand. No computers, no Computer Aided Drafting (CAD), just good old by hand drafting.

Life was good, I wasn't sacking groceries anymore but had a "real" job that paid much better than before. This was what I had chosen as my career and I was living it.

Then something funny happened. M.J. and the other engineers started asking ME to go out with them and help TAKE field notes, and then I was being sent out to take field notes on my own to design where cables would be placed and connected to the phone systems. It wasn't just me, their were other draftsmen as well but it felt good, I felt important and subconsciously I guess I wanted more.

Better pay came with the added duties so no complaints there. Even without the added pay I would enjoyed the new learning and accomplishments. Times seemed to move fast. There were good times when had more to do than was possible and there were bad times when it was ok to play frisbee outside for extended times because there wasn't enough work to stay busy but M.J. and the other owners didn't want to let us all go.

Slowly the work came and we were busier than ever. Soon we were in a newly remodeled building and I even had my own OFFICE. I was a twenty something with an office and a well paid job with generous wages and not having to commute an hour each way to work. Life was good.

PDP-11/34 Main CPU
As the company grew, the need to diversify was made and my first exposure to a "computer" came through M.J. Madden and Tel-Elec. The company purchased a DEC PDP 11/34 system for time sharing stepping into the computer age in the early 80's. This was a nearly $100,000 investment back then I understand and before long *I* was actually given an account and allowed to play on this mini computer. Wow. It was very interesting. So interesting that I had to have my own and purchased a Sinclair ZX-81 "kit" that my Dad helped me assemble to learn more about this new world.

Before long I was entering code in the PDP using a BASIC type of language and learning how to program through sample programs and trial and error. I found a "Drag Race" BASIC program that would let you input the horsepower, weight, traction factors, and more and would crank through the calculations to "run the race". It took longer for the program to run than a real drag race did sometimes but it was still pretty cool.

The computer bug was well established and from there on that was my interest. I was given opportunities to update, enhance and write programs for our Time-Share customers and before long we bought PC based computers... not some expensive IBM but CPM-86 computers before the day of the "Standard PC". Quite an amazing time period. A time with ISDN 128kb data speeds were pipe dreams and the "future" of business and homes. I even had a dual channel ISDN circuit at home later on which was quite expensive back then but amazingly fast for the time.

Honestly I owe my career to M.J. Madden who saw a little talent, a little drive, and opened up doors for me to prove, to myself mainly, that I could do it, I could learn, do, and excel at things that the future would bring.

I am still amazed that I was allowed to be responsible for long range outside plant plans, telephone cable air pressurization projects, and the large computer projects that were made available to me in those early times during the 1980's.

It seems so little, so small by comparison to just say "Thanks M.J." for being not only the mentor but providing the opportunities for me to see what I could do during my twelve years with the company.

Stephen W Nolen


Sunday, November 6, 2011

Technology is a Tool - Not a "Tool"

Technology is a Tool

(Just an excerpt from the most recent IT Update at the City of Shawnee I wrote. Nothing earth shattering but quite true IMHO)

Just like the caveman used a club and fire, the modern man and women have tools to do the jobs of the day. The computer, and other technology, are simply that… tools of the current time. Yes, we still use clubs and fire, but just like in the caveman days, the ones what knew and used the tools the most effectively survived yet another day and thrived.

It’s pretty hard to think of any position at the City where a computer type device doesn’t come in to play somehow, somewhere… or won’t be in the near future. Meter readers use handheld devices, janitors use email, offices workers spend a majority of their time on a box, Police have laptops in their cars, Fire has iPads in their hands. Water and Sewer plants run on embedded systems, and Cemetery workers use databases and soon GPS and GIS. Garage mechanics lookup manuals and help online, and soon line workers will be using iPads to see their networks of water and sewer pipes.

So when we hear someone say “I don’t know much about computers” I pause and think: “How do you do your job then?” I know, maybe we’re partial to the whole technology thing since that’s our job to keep it all working, but seriously, how do you do your job the most effective and efficient way if you don’t know the tools you use?

If you’re waiting for someone to show you everything you need to know then you’ll always be behind the learning curve. Just look around a little and you’ll see all kinds of help waiting there for you to be proactive with. On the COS Intranet you’ll see Computer Self Help, INCODE Help and Documents, Global Records information, how to add printers, setup email, and more. And once you are using a piece of software, nearly everything you need to know is often lurking behind that HELP button or menu item. If you say you don’t have time to learn, I challenge you that you don’t have time NOT to learn how to be more effective with the tools of the 21st century… technology and computers.

Just don’t use the club or fire I talked about on the Computer.. that doesn’t help.

Thursday, October 27, 2011

Presenting YouTown - Learning about OKC.gov


In October of 2011, I had the opportunity to assist in a presentation on a mobile app the City of Shawnee is currently testing / deploying for one of our mobile solutions as well as sit in on a meeting about a major website redesign project the City of Oklahoma City has underway. Interesting and informative day.

YouTown App Presentation

The presentation audience were government entities, primarily State Agencies and Libraries, from across Oklahoma attending the annual Oklahoma State Webmanagers Group (OSWG) - See #OSWG hashtag on Twitter or the OSWG Website for more information. Although I did not attend many sessions due to presentation coordination and planning time on site, both Governor Mary Fallin and Oklahoma State CIO Alex Pettit were keynote speakers at the conference.

The presentation went well with DotGov Inc/YouTown's Director of Government Operations Sid Burgess leading off the discussion about the history behind the app, and an overview of the company. Sid has been a local Gov 2.0 advocate in Oklahoma City for several years and was the brains behind the past Oklahoma Gov2.0a (applied) forums that brought in Open Government and social media experts from across the nation for presentations, City Camps, and discussions. Sid is moving to Seattle to open up the first DotGov offices in the United States the end of October 2011. He will be missed greatly by many in the OKC and beyond area.

Derrick Silas, Web Communications Development/Social Media Specialist from Enid continued with their involvement in the YouTown Beta test run, why they chose YouTown and how to setup various features of the app from the dashboard control. Derrick is deeply involved in the re-branding of the City of Enid and their use in Social Media and Mobile access and helped to bring YouTown to the forefront for Oklahoma cities.

I then discussed the news feeds, the ability to repackage existing data from your existing RSS feeds and the mapping options with emphasis on how we at the City of Shawnee are generating dynamic KML maps of all the various data feeds we have such as CAD Calls, nuisance properties, Police Incidents, etc. We appear to be the only YouTown user of the 300+ cities participating in the app that are currently doing this dynamically. However, we are lacking in general GIS maps such as zoning, water and sewer lines, etc as this information needs to come from the proper department in either SHP or KML formats to be utilized.

Although the audience were not City or Town based, DotGov plans to rebrand the app as simply DotGov or DotGov Mobile and market up the layers of government as they have done in other parts of the world. This provides the ability for a single app to aggregate news/events/mapping and service feeds for end users in a single app solution if desired. There are challenges, but acceptance at the City level has surpassed their expectations and projections to date.

If you haven't already, you should download the YouTown app in the App store for Apple devices or the market for Android devices. We will have a story in the Shawnee Outlook Magazine in the near future that will be timed with a press release and official publication of the YouTown app as well as our City of Shawnee Mobile Website.

I did stay and listen to marketing expert Korey Mcmahon from Norman Ok talk about using Social Media to market basically anything. Good session with general discussions of the various channels, motivational information about the possibilities and tools to monitor and use in the Social Media world. Nothing strikingly new based on our past use and experiences at the City of Shawnee but reaffirming if nothing else.

I also had a long lunch and coffee with Sid Burgess discussing the YouTown app, DotGov's future plans, and a City's needs and limitations, resources, etc as well as some technical features behind our data. DotGov is also working towards Open Data standards in government services and data that can allow better data exchange and more transparent government. I was asked to consider future travel to Seattle for a two day brain storming / discussion session to help explore the directions of DotGov and the needs of Cities similar to ours.

Link to a news release we are in: http://www.launch.is/blog/gov-20-youtown-brings-power-of-paying-parking-tickets-to-and.html

Oklahoma City Web Site Redesign

While at the OSWG conference I was asked via Twitter by Oklahoma City Creative Manager Zach Nash to attend a public meeting about the redesign project of the Oklahoma City website (OKC.gov) at 6:30pm that evening. Zach was presenting / presiding over the meeting and was looking for input for discussions. I dropped by the meeting to learn more about their process. Unfortunately this particular meeting was very lightly attended with mostly staff from the PIO's office and IT being there. This is a City the size of OKC and that is the participation they get at this point. :-(

Although discussion was limited, it was another good opportunity to talk again with OKC IT and PIO contacts such as Zach and the Director of the Public Information and Marketing department Kristy Yager as well as IT R&D Specialist David Grothe and IT employee Dustin Gabus. The presentation was helpful outlining existing issues and future goals of the OKC marketing department and website as well as their hooks in Social Media. Information on their efforts to collect input to plan the redesign can be found at http://www.OKC.gov/Redesign including their ongoing survey page which may be helpful in the future for our efforts. They are using a wide variety of input options including the survey, public meetings, email, Twitter, Facebook, Tumblr and Wireframing apps as well as old school postal mail. A big outreach effort to insure the direction is what citizens want and /or expect.

Just another day well worth it outside the office…

-Stephen W Nolen

Thursday, January 27, 2011

Life...

So you fight the battles, figure out how to get through the best way you think you know how, make what you think are wise decisions, look forward and try to plan your best route through this thing called life and then WHAM - smack in the face it can all unwind.

Of course when you look back you usually see all those mistakes you couldn't see at the time. Those mistakes you should have seen but didn't. Maybe someone told you about them, pointed them out, but...

Those same mistakes also seem to be because many, if not most of those decisions, plans, and maybe even dreams where self centered, very much about YOU only.

It's funny and sad how you can get so tied up in what you think is "living", that when something hits you in the face and life stops for a moment for whatever reasons and makes you ponder, what you really care about the most may be already be lost and those things you were "living" really do not matter much anymore.

I'm sure like everyone says when you pick yourself back up and get back on the road of life things will get better again. Hopefully they don't get bitter as well. Just picking your way through the crash is very difficult, scary, and sad.

I recently heard this quote the other day but it is so fitting for life:

"Cherish today what you have because you don't know what tomorrow will bring or take away."

And true to it's form this does happen....

Thursday, May 20, 2010

The Future is Young...

Information Technology managers have to deal with "new" often as technology itself changes daily, but as the work force gets younger, IT managers also have to deal with "young".

The challenge, in my mind, is going to be how to "Manage IT", but provide the resources and creative outlets to meet the demands of the next "young" generation. The generation growing up in the socially connected world of Facebook, MySpace, Twitter, Flickr, and beyond... WAY beyond in fact as new ways to communicate and work are added every day. Where time at work and time at play have no clean edges. Sometimes that is good - the melding of personal communication and work skills at least in the Government world where MORE transparency, collaboration, and participation is not only desired but ENCOURAGED and not only for our citizens and customers of the government, but for it's employees as well.

"UnManaging" Managed IT

For those that have managed networks, systems, applications and Internet access for very long, you know the challenges faced to keep that balance - Secured and controlled, but not restraining. Of course 'restraining' seems to be quite relative depending upon if you are "in" IT or not. To some not being able to spend all work day on Myspace, Facebook and Youtube IS 'restraining', for others anything besides official "approved" websites is insubordination. Finding the balance both technically and administratively is one of the bigger challenges I see facing IT and management in the future.


Obviously you have to empower your employees, citizens and customers to use the modern tools of communicating and getting things done while insuring all this is done without wasted time, resources, and money. Letting things "be free" while not giving away the farm... or City... or country in the process. A place where fewer FILTERED SITE ACCESS LOGGED screens are encountered but more productivity is obtained through true collaboration and communication.

But it takes more than just empowering citizens and employees to use social media tools to do their job better, it also takes the mature use of those tools by employees AND citizens for the betterment of the entity, not just the enjoyment and entertainment of the employee or the anonymous bashing of public officials or entities by the Citizens.

Can it be done? Sure. HOW can it be done? Not sure..... yet.

It should be very interesting in the next few years as "Gov2.0" concepts take over the historically bland world of local, state, and national governments entities.


Stay tuned - the ride should be worth watching.

-Stephen W Nolen

Sunday, January 24, 2010

Online House Updated - Home Automation

Fueled by many cups of 1/2 Caff coffee (hey you have to cut down when you get old), cold and wet weather and a huge need for an update, I've spent my spare time in the past week or so updating our Online House and home automation system. The house can be visited HERE and the descriptive history is found HERE.

We've had an "automated house" since way back in the 80's when I had an old VIC 20 computer turning lights on and off. The next step up was in the 90's when we moved and I purchased a JDS Timecommander Plus system. The new system provided much more capability and is still the stable work horse for our system. When we moved to our current house in 2000, the system moved with us but the installation was half hearted. It worked fine and spent the past 10 years doing it's job but needed to be cleaned up and some new features added and some broken features fixed.

I feel I have somewhat accomplished that... but there is plenty more to do. The biggest need was to get a better mobile phone interface. The house has had mobile access for a very long time when "WAP" and "WML" were the only thing a phone understood. With the advent of the new smartphones and the iPhone that world changed and a much better interfaced was needed. The iPhone can handle the main site but it is still not optimized for small touch screens. The basic screen is shown at the right and allows access to most all the features and information the house provides. This interface will continue to get updated as ideas pop up and time allows. For now it is much easier to use from anywhere in the world to not only know what is up in the house but to control things as well.

Some of the "new" features... although planned all along, just not implemented, are the integration of the HVAC units so I know when and for how long each unit runs. Not a big deal but nice to know for cleaning filters and maintenance issues. I also re-integrated the washer and dryer that had to be removed when new units were purchased. Another fix, not new feature, but a handy item to have the system tell you when the machines are done across the speakers instead of waiting for that high pitched beep that I can hardly hear anymore...another getting old thing I guess.

On the new side all new paging and email routines were added to keep me updated even if I am not looking at the house remotely. Items such as burglar alarm, garage door opening during the day, motion detection when there should be no motion, phone calls, etc were added. A new routine to speak the current weather forecast was added that gets the Yahoo weather RSS feed, breaks it down and speaks it on command. Handy sometimes. I also added some bluetooth based proximity sensing. The system knows when I am around the server and can act upon that. Nothing really programmed in yet but the capability is now there.

The biggest thing added was putting the house on Twitter at http://Twitter.com/NolenHouse. Yeah, I know... WHY? Because I can? Because *I* like the idea. There are only a couple houses I could find that have done this and with my work on @ShawneePD and @ShawneeFD it was so easy to do... so WHY NOT?

I also updated the basic look and feel of the control pages replacing icons from the old clipart versions to new, more modern looking ones from across the net. I also changed the color theme "back to blue" because that is what I like.

But what about security?
That is the biggest question I seem to get and it *IS* a valid one. With all that information out there couldn't someone figure out when you are home or not and break in. Sure they could... just like they could your house by simply counting cars or watching the house. Of course THAT is what all the automation is about. Webcams that capture pictures, motion sensors that know when someone is there, burglar alarms watching windows and doors, and more that will not be listed here. So yes, it is a concern but the house has been online since 1999 doing it's best to protect and serve.

Of course there is always the watch dog... no, not THAT one...

For more information about Home Automation visit the Wiki or visit SmartHome.com.